This is a surprisingly common question for new iPod owners who are using Microsoft Windows on their PC, and the basic answer is that you must use Apple iTunes to get music onto your iPod. Windows Media Player can see the iPod, but only as a hard disk, the section on the iPod where the music is stored is "hidden" and only iTunes knows how to get to it.
Let me take you through the steps of getting some music onto an Apple iPod with iTunes on a Windows XP system, then I'll show you quickly why WMP can't do the same thing.
The first time you plug your iPod into your PC via the included USB cable, you'll probably see something like this:

What's happened is that the underlying drivers for this class of device have been updated by Microsoft and the changes have been automatically applied - thankfully! - but you need to reboot. Do so, and then the next time you start up, your iPod will not generate any messages of this nature.
Now you really need to get a recent copy of iTunes onto your PC. There's a CDROM that's included with your iPod that has the iTunes program thereon, but if you don't want to mess with that, you can simply go to apple.com/itunes to download the latest version.
The next step is to actually launch the iTunes program. If you don't have the very latest version, you might well see this dialog window:

Generally, it's a good idea to make sure you always have the latest version, so click "yes" and it'll pop up your Web browser and take you directly to the download page, at which point you want to enter your email address, uncheck any boxes to skip certain types of email, and start the download:
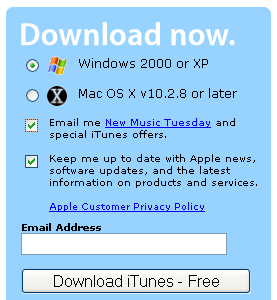
I always uncheck these boxes, personally, as I already get too darn much email, but you might enjoy learning about free music available from the popular iTunes Music Store, etc., as indicated.
Either way, eventually you'll be able to launch iTunes and have it start up, rather than ask you to do other stuff. At that point it will recognize the iPod that you've plugged in and step you through the registration process.
It'll look like this:
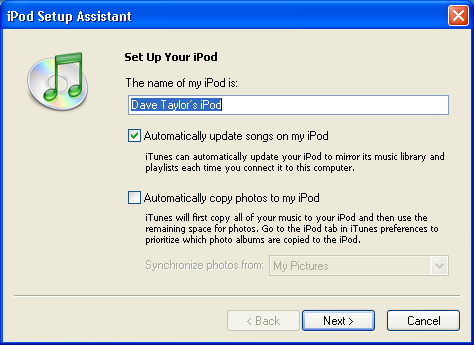
You can stick with the default name for your device, but I always try to pick something more fun. For this 30GB iPod Video, I'm going to call it "MicroTV", because, well, it's a pretty tiny video screen. I also uncheck "automatically update music" because I like to control what happens to my iPod manually rather than have things magically occur and then not be what I want. You may find that having iTunes sync your iPod automatically works better for you, however.
When you're done with this configuration step, click "Next" and you'll see:

If you're so inclined, register your iPod, or just click "Finish".
Now, finally, you can see iTunes in all its glory:

All the colorful material in the middle is from the Apple iTunes Music Store. On the left side column, notice all the various categories of music and content, very similar to Microsoft Windows Media Player. Just below the Music Store, however, is what we seek. It says "MicroTV", as that's the name of my iPod.
Click on this entry, whatever name you've given your own iPod, and you'll see your music list, which is completely blank:

Now click on the "Library" link also on the left column and you'll see what albums or music you've ripped or otherwise copied into your iTunes library. If you haven't ripped any CDs, put one into your computer and click on the "Import" button in iTunes that'll show up.
On this particular computer, I've already ripped a few audio CDs, as you can see:

There's a much nicer way to explore the music, however. Click on the "Browse" button on the top right (it looks like an all-seeing eye) and a new panel will show up that lists genre, artists and albums too:

I'm going to go ahead and copy my jazz album, by Jeff Lorber, onto my iPod. I do that by clicking on the "Jazz" genre, then dragging and dropping that onto the name of the iPod on the left side. Then I can see the music being copied onto the iPod itself:
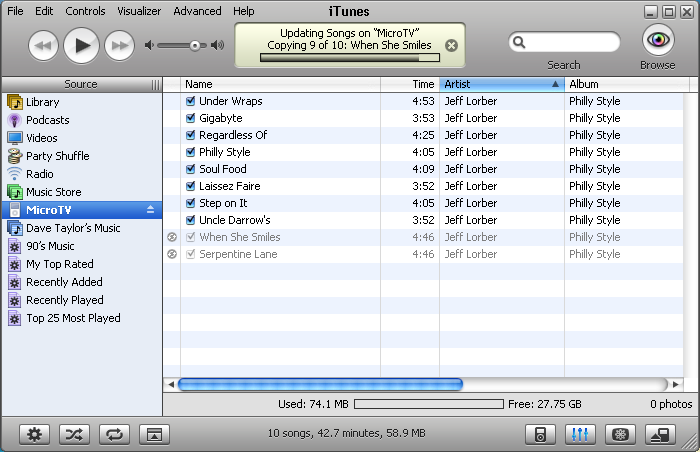
Doesn't take very long, and once it's done, I can eject my iPod and start enjoying the tiny music player.
However, let's have a quick peek at the basic iPod configuration while it's still plugged in by clicking on the "iPod Preferences" button on the bottom of the window:

The preferences look like this:

You can probably leave them all as-is, but that's how you get to them if you want to change anything about your iPod.
At this point we're done. The easiest way to disconnect the iPod from your computer is to click on the little "eject" button, but before we do, let's have a very quick look at how Windows Media Player sees the iPod and why it's so darn hard to get music from WMP to an iPod.

WMP certainly doesn't show a "MicroTV" option to make life easy. Click on the "Sync" button, however, and you'll see that it can indeed see the iPod that's plugged in:
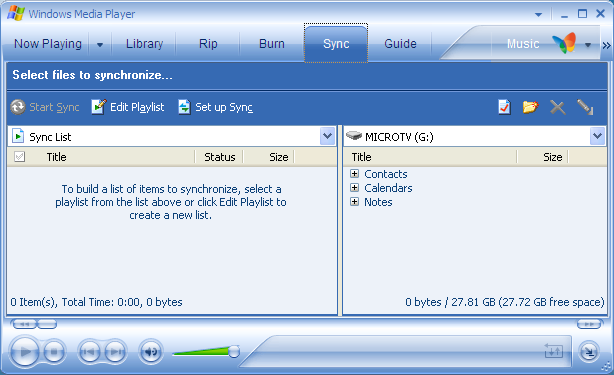
This is deceptive, though, because the section of the iPod that holds the music that the iPod player itself can access isn't what's listed. The iPod can serve as a convenient and portable hard disk, and it's that section of the device that WMP can access. Copy music and it'll be accessible by another Windows system, but the iPod itself won't see it. Not good!
To actually get music out of WMP and onto an iPod involves some conversion and fiddling around, as detailed here: Convert WMA into MP3 for use with iPods.
Let's go back to iTunes, however, and eject the iPod. That's done by clicking on the tiny upward triangle adjacent to the iPod name:

Now the device is disconnected and you can unplug it, plug in some headphones or earbuds and enjoy your music!
Working with the iPod Itself
The easiest way to do that? Push the play button once on your iPod to wake it up, and you'll see this:

Now use the scrollwheel to highlight either "Playlists", "Artists", "Albums", "Songs" or "Genres", the push the button in the middle of the scrollwheel to select that choice:

I'll select "songs", and here's what I see:
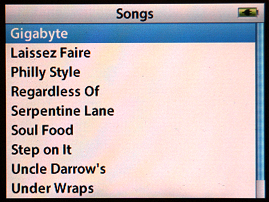
Now I can pick a specific song by again using the scrollwheel, then click "OK" (the button in the middle of the wheel) and the song starts playing:

And now, let's relax with our own personal jam!
Hope that helps you get up to speed with the iPod. You'll find it gets a lot easier to work with after a few minutes of fiddling around.
Source:http://www.askdavetaylor.com/how_do_i_put_music_on_my_apple_ipod.html#4diUOmpELc5Z3Klp.99

This web site really has all the information I wanted concerning this subject and didn't know who to ask.
BalasHapusMy weblog ... low cost seo toronto
Hi, all is going nicely here and ofcourse every one is sharing
BalasHapusinformation, that's actually excellent, keep up writing.
My webpage - great savings
I used to be able to find good information from your content.
BalasHapusmy page printable grocery coupons
What's up, its fastidious post concerning media print, we all be familiar with media is a great source of information.
BalasHapusHere is my web blog homemade laundry detergent
WOW just what I was searching for. Came here by searching for question and answer
BalasHapus